At the end of this month, I will be taking a trip to Paris! Yep, that's right: bread and pastry central. I've been to Paris before, to visit Disneyworld, but the quaint pastry shops and bakeries stocked to the brim with freshly baked bread were not on my itinerary back then. I can tell you, they sure are now! And what better to get into the mood than a quintessentially French bake: the baguette. In my opinion, it's one of the more difficult breads to bake, but its ingredients are quite simple: just flour, yeast, salt and water.
I had attempted to make baguettes before, but failed miserably. They turned out as ciabattas rather than baguettes, you really want to achieve those nice, slim and pointy loaves. As luck would have it, my friend Nadine (who is also traveling with me to Paris) and I were invited by fellow blogger Mannin to bake at her house. I more than happily accepted the offer as I know Mannin is a skilled bread baker. She bakes all of her bread herself and now also teaches workshops on bread in her house. I boldly asked Mannin to share her baguette skills with us and she kindly agreed to. We managed to bake these lovely, crispy, classic baguettes with a far superior flavor to those you buy in the supermarket (or in a regular bakery, to be honest). No additives or funky business, just the basics executed to perfection. We got to take a couple home, where they were received with rave reviews. With the right instructions and tools, I believe that anyone can make these beautiful baguettes! Get a taste of France in your kitchen today (or actually tomorrow, because the dough should rest in the fridge overnight)!
NB: For the Dutchies amongst my readers: the recipe is posted on Baksels.net in Dutch if you prefer!
 |
| Nadine scoring her shaped baguettes (picture by Mannin - baksels.net) |
Rustic French Baguettes Recipe
Tools: food thermometer (crucial!), baking parchment, baking tray or baking stone
Ingredients:
500 grams French bread flour (type 55 or 65)/ US all-purpose flour
10 grams (baker's) salt
2 grams instant yeast
300 grams water, at room temperature
20-25 grams water
rye flour for dusting
1. In a large bowl, weigh out the flour and salt and combine with a whisk. Add the yeast and combine with a whisk once more.
2. Add 300 grams of water and:
- knead for 10 minutes in a free-standing electric mixer with the dough hook attachment - then gradually add an additional 20 to 25 grams of water and knead until the dough passes the "windowpane" test.
or
- bring together with a wooden spoon, then turn out onto an oiled working surface and knead by hand for 15-20 minutes, adding the additional 20 to 25 grams of water gradually in the last five minutes. Knead until the dough passes the "windowpane" test.
3. Once kneaded, turn the dough into a large, oiled bowl and cover with cling film, a kitchen towel or a lid. Rest the dough in the fridge overnight (your fridge temperature should be 7°C/45°F).
4. Take the dough out of the fridge, carefully insert your food thermometer into the dough and leave dough on a kitchen counter until the thermometer shows 17°C/63°F.
5. Once the dough has warmed to the right temperature, carefully turn the dough out onto an unoiled, unfloured working surface. You might want to oil your hands before handling the dough. Cut the dough into three equal pieces with a dough cutter. Then shape each piece into a baguette by following these steps:
- Gently push the dough into a rough rectangle shape, keeping the longer side on top.
- Fold the top just over the center and gently seal it, then fold the bottom flap just over the seam and seal it again.
- Fold again, this time all the way from the top to the bottom, gently pressing to seal. The folding is necessary to keep the dough's tension (so it won't spread out and get a ciabatta shape!). Be sure to handle the dough very gently throughout as to retain the bubbles which you have just created by resting the dough. The bubbles will give you a brilliant texture in the end.
- Lastly, slowly roll the bagette out to the desired length, using both hands.
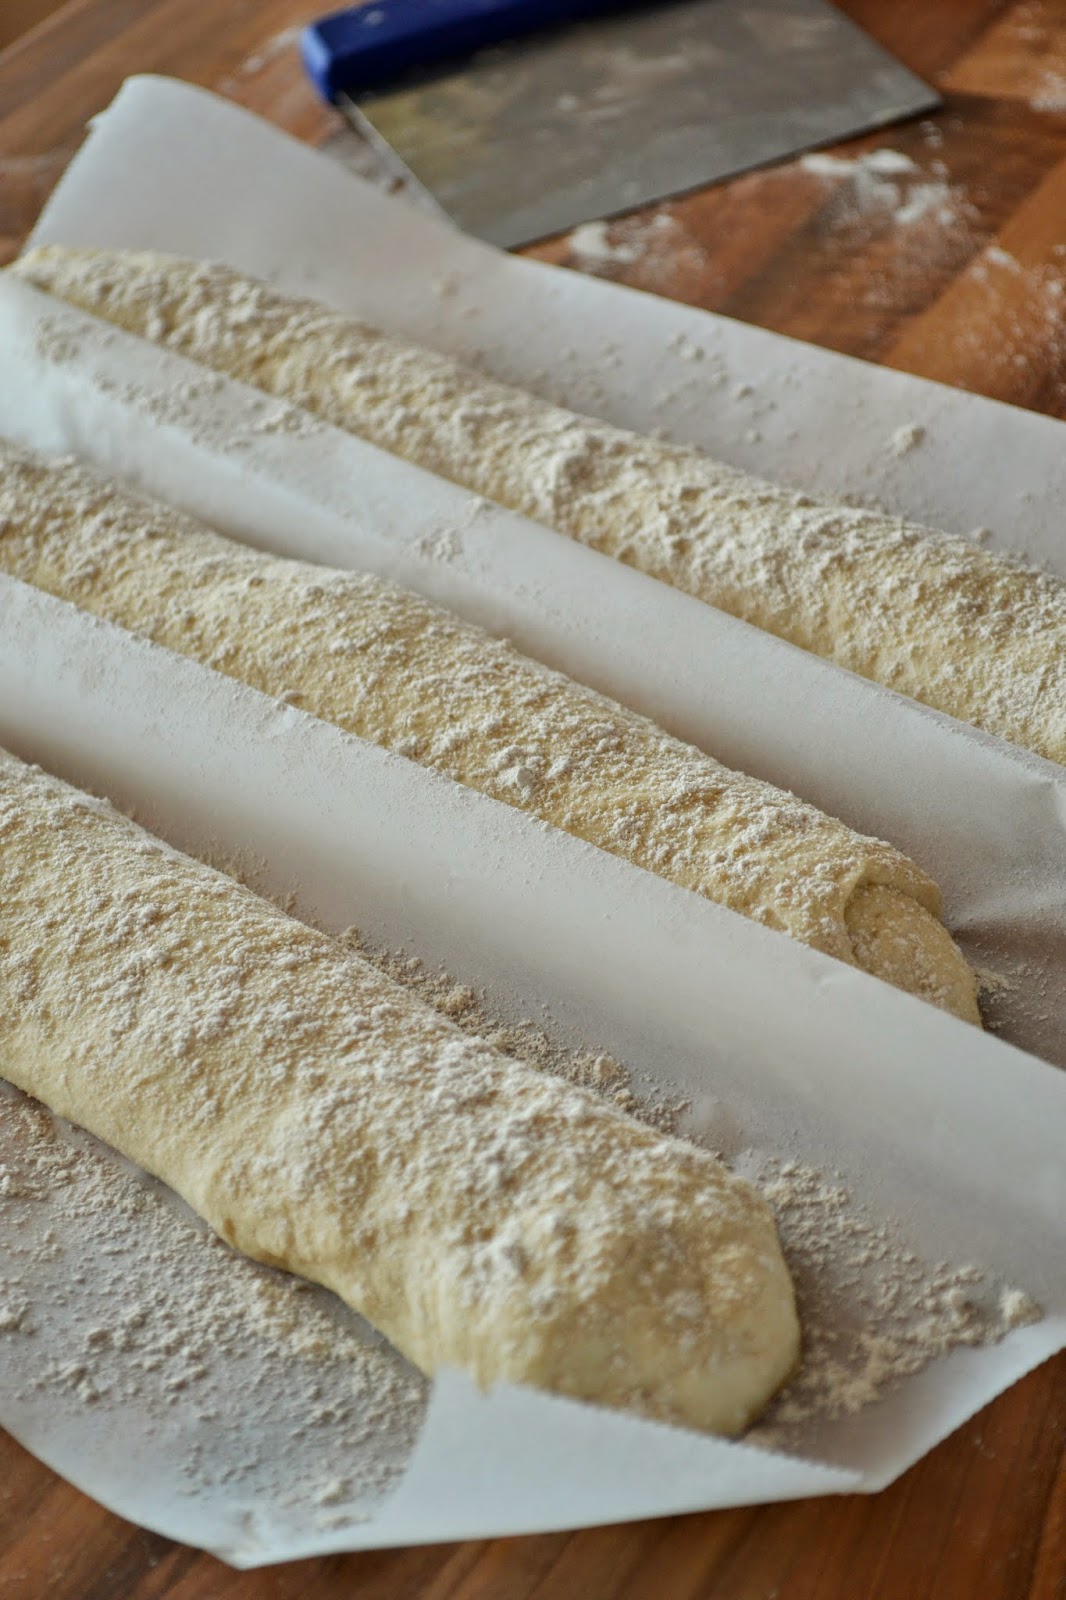
6. Place each baguette on a sheet of baking parchment (on a baking tray if using), seam down, folding the parchment so that the baguettes are right next to eachother, but the dough is not touching (see second and third image). Dust each baguette with rye flour and place a kitchen thermometer underneath one of the baguettes. The baguettes are ready to go in the oven when the dough springs back slowly when touched.
7. While your baguettes are resting, preheat the oven to 240°C/460°F. If you're using a baking stone, place stone in the oven to heat.
8. Once rested, score the bread 5 to 7 times with a bread lamé or a sharp (bread) knife (see third picture). You should "peel" the baguette's skin as it were. The scores should be vertical rather than across the baguette.
9. Place an oven-proof container with water on the bottom of your oven to create steam. Then place baguettes in the oven, either on your pizza stone or baking tray. Turn down temperature to 230°C/450°F. Bake baguettes for 20-25 minutes or until golden brown.
10. Leave baguettes to cool on a wire rack, or eat while they're still warm (not immediately though, we don't want burnt fingers or tongues!). You can freeze these baguettes - to get them as crispy as the day they were baked, place them in a preheated oven on 200°C/390°F for 10 minutes. You could also spray some water in the oven to create steam for extra crispiness.
Labels: Advanced, Bread, French, Overnight
